To create the shortcode, you must be logged in as admin. Go to admin dashboard -> WP SFT PRO page and click on the Shortcodes
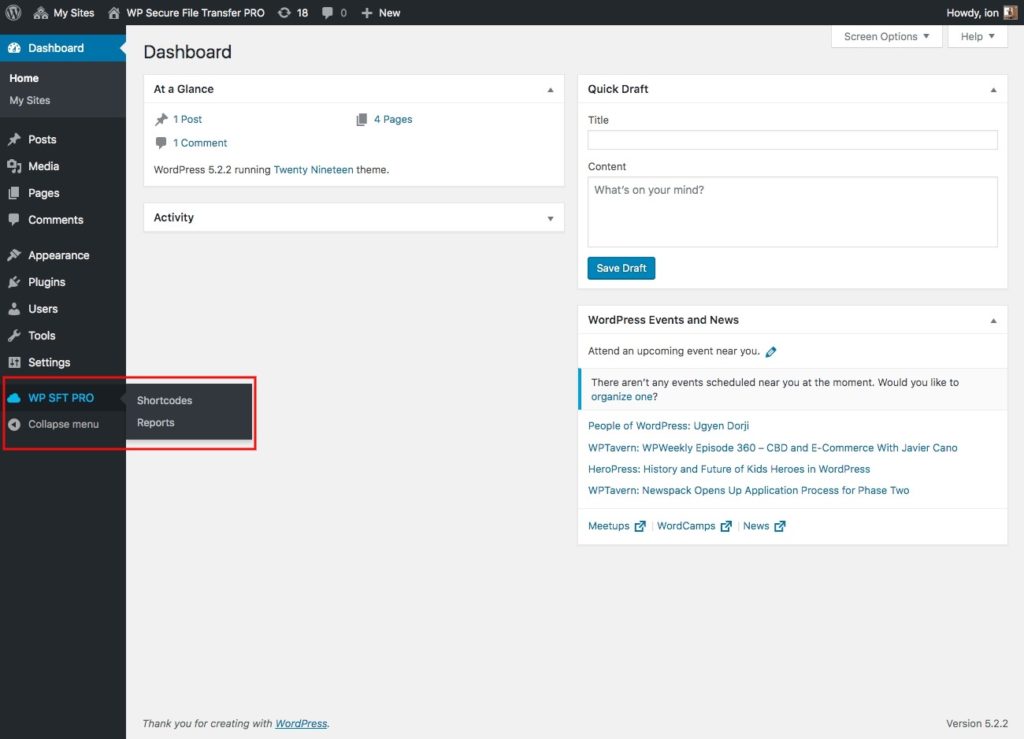
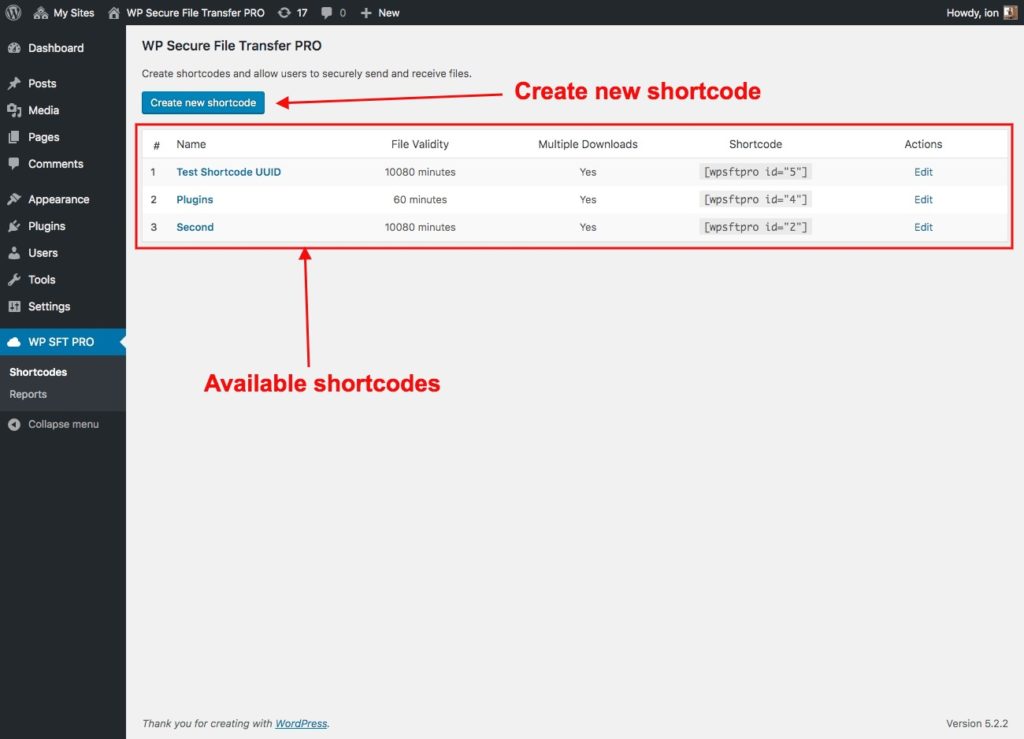
Click on the “New Shortcode” button:
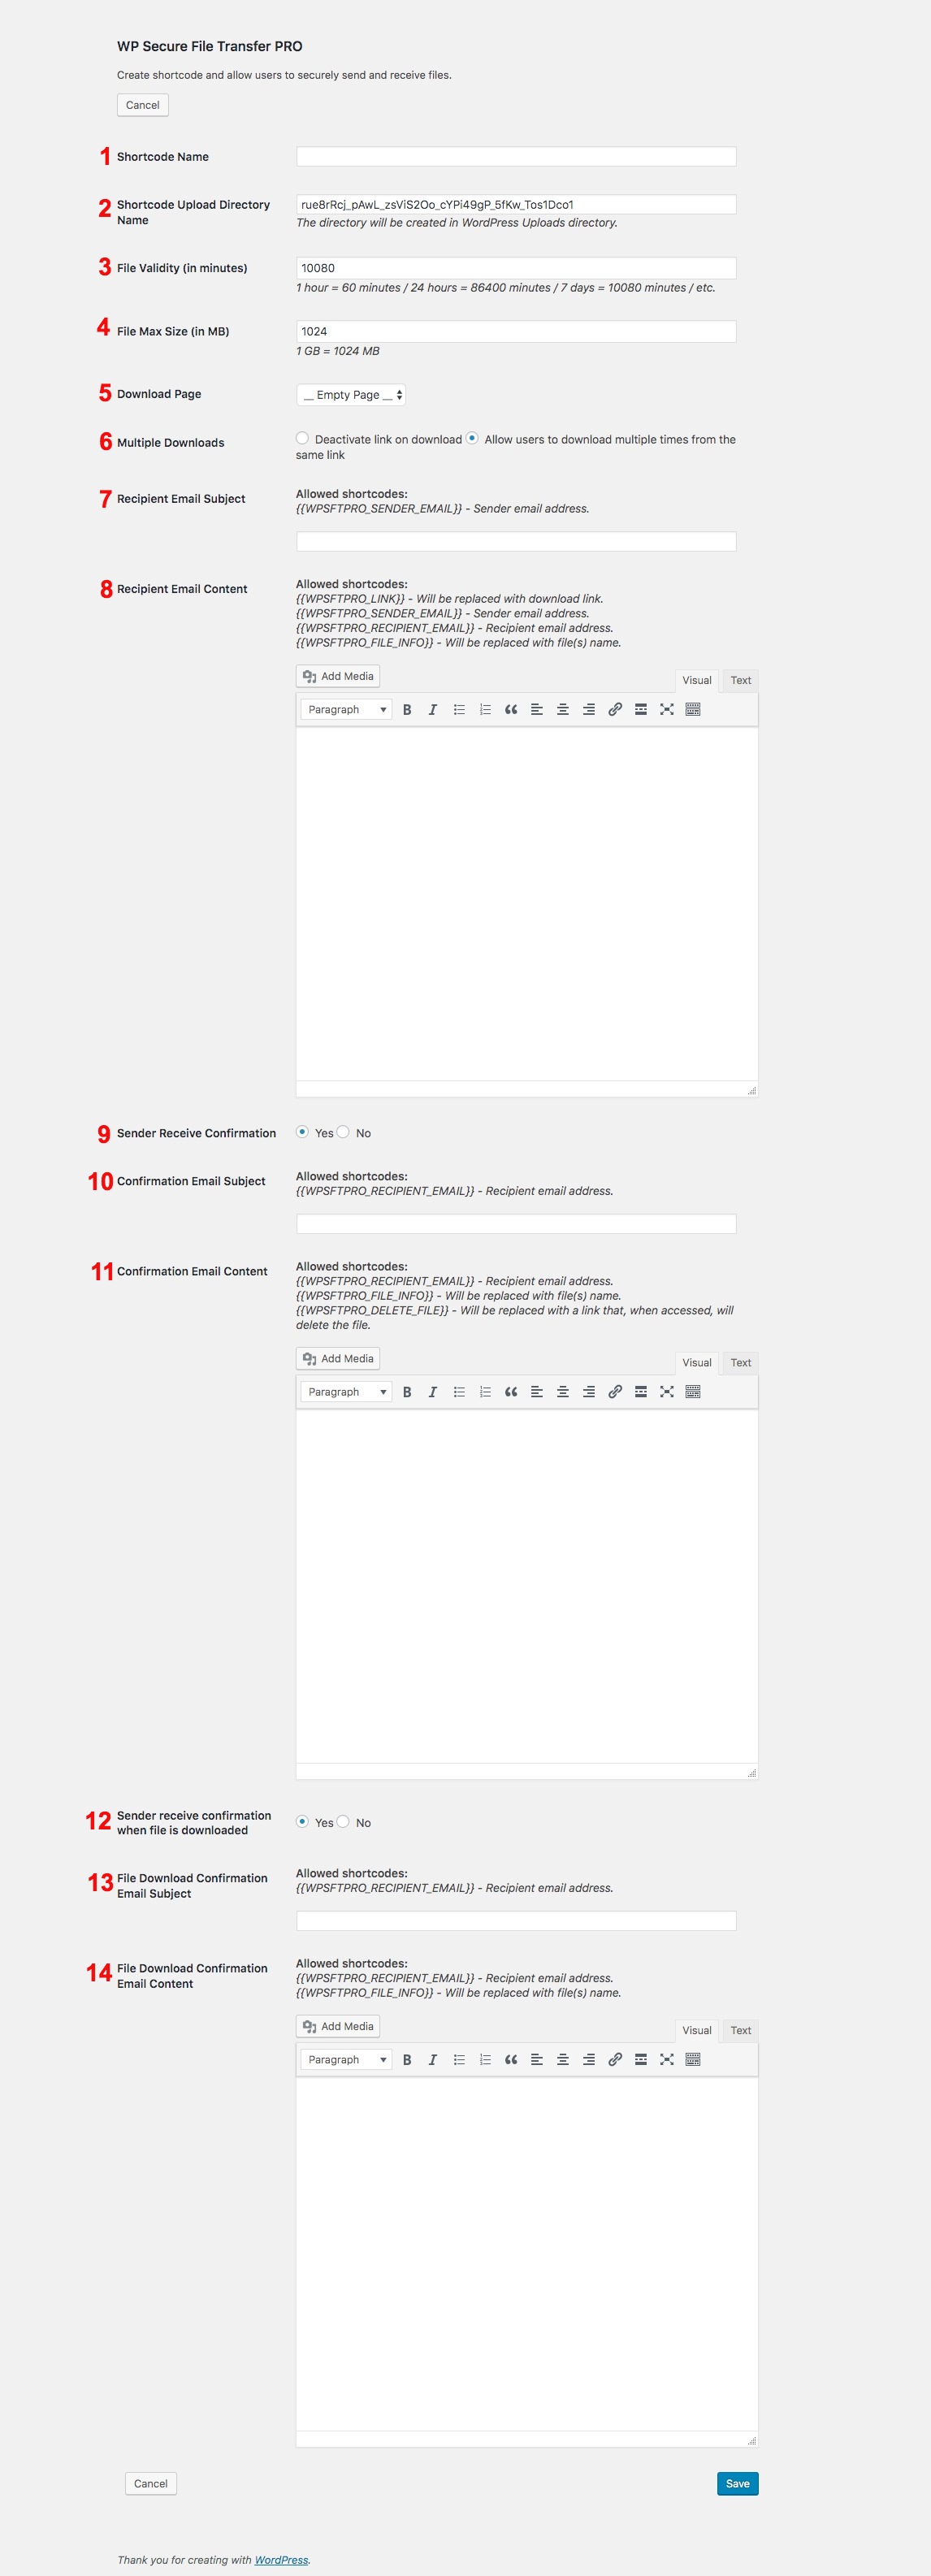
In the shortcode page, the following fields are available:
- Shortcode Name – type the shortcode name here.
- Shortcode Upload Directory Name – type the name of the directory where the files will be uploaded.
- File validity – how long should be valid the download link. The file will be deleted automatically when the time expire.
- File max size – the max file size allowed to be sent.
- Download page – here you can choose what the user should see when accessing the download link. The first option in the select box is __Empty Page__ which means that a user will see just the file name and download link. Choose a page if you want to customize the content. To display the file data, use the {{WPSFTPRO_DOWNLOAD_DATA}} shortcode in the content. If this shortcode is not found in the content, file data will be prepended to the post.
- Multiple Downloads – allow users to download multiple times the same file from the same link. To disable, choose the “Deactivate Link on Download” option.
- Recipient Email Subject – the recipient user will receive an email notification about files he received. Set the email subject by completing this field. The shortcode {{WPSFTPRO_SENDER_EMAIL}} will be replaced with user’s (that is sending file) email address.
- Recipient Email Content – the recipient user will receive an email notification about files he received. Set the email content here.
- Sender Receive Confirmation – here you can set if the sender will receive confirmation email that files are successfuly sent;
- Confirmation Email Subject – if the sender user will receive an email notification, then you can set the email subject by completing this field.
- Confirmation Email Content – if the sender user will receive an email notification, you can set the email content here.
- Sender Receive Confirmation when file is downloaded – here you can set if the sender will receive confirmation email when a file is downloaded;
- File Download Confirmation Email Subject – if the sender user will receive an email notification on file download, then you can set the email subject by completing this field.
- File Download Confirmation Email Content – if the sender user will receive an email notification on file download, you can set the email content here.