As we learned from the previous article, we can display the shortcode as a text link or we can send it via email after a form is submitted.
If you opt for a second option, then you can collect from the users their name, email address and display a checkbox for terms and conditions. After the form is submitted, an email will be sent to the user.
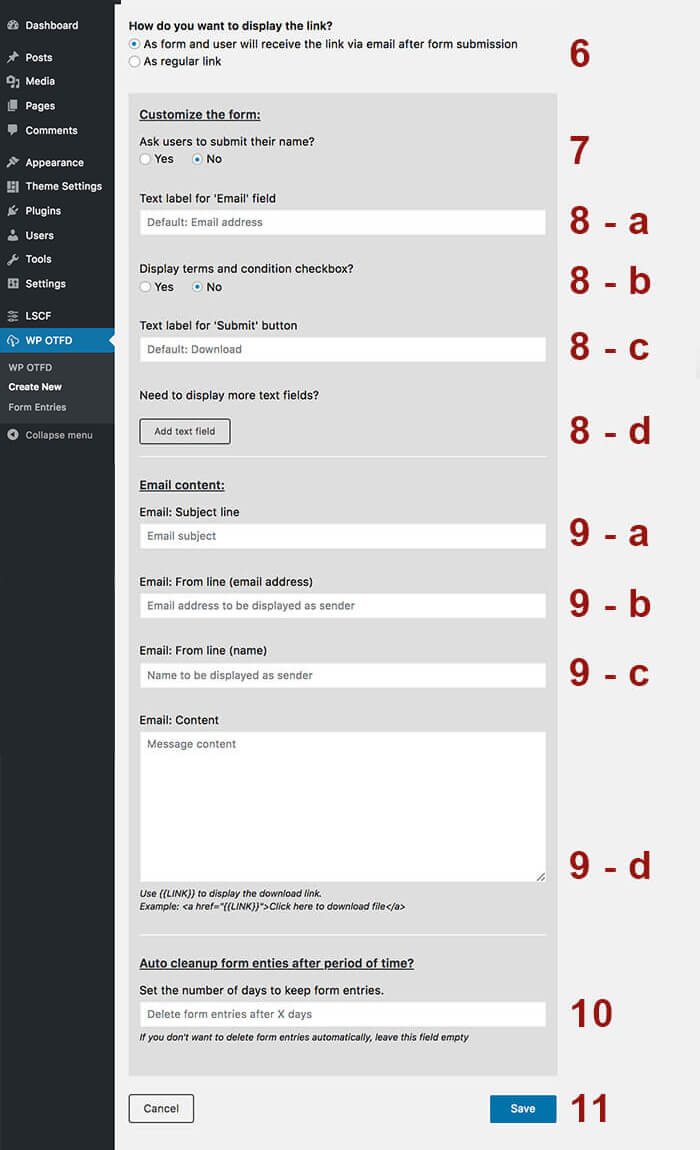
7. Ask users to submit their name – Here you can choose to display or not the field where users can submit their name.
8-a. The text label for email field – Here you can set the label for the email address field.
8-b. Display terms and conditions checkbox – Here you can choose to display or not a checkbox and set the text label for it.
8-c. Text label for submit button – Here you can set the text label for the form submit button.
8-d. ‘Add text field’ button – sometimes you’ll need to display custom fields like country, company, age etc. in form. In this case, you can add custom text fields.
10. Set the number of days to keep form entries – in case your website is used by EU users, then you’ll have to take care of GDPR. This option comes to help you – set the period of time to auto remove the form entries.
To edit the content of the email that user will receive after form submission, please check the next article.