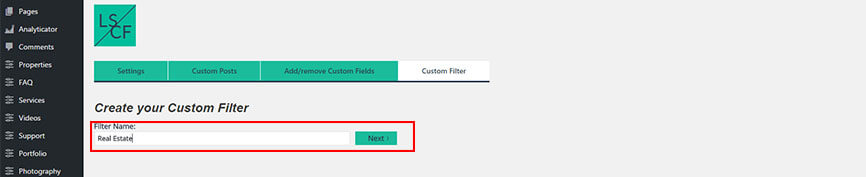
- To generate a shortcode for your own custom filter go to LSCF page, then click on Custom Filter tab from the menu.
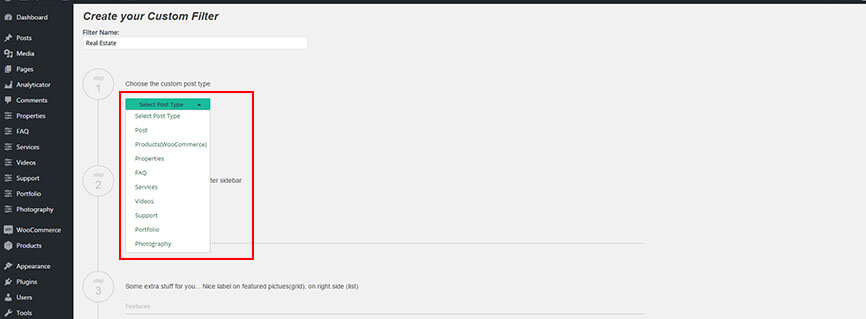
- Select a Custom Posts type to filter.

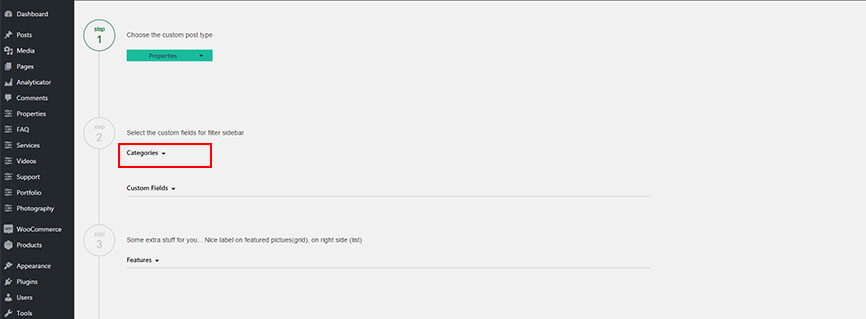
- Our WordPress Advanced Filtering Plugin allows you to filter the Custom Posts by taxonomies/categories and custom fields (added with LSCF).
- In case if you want to filter the posts by taxonomies/categories – you need to make sure that they were added already to Custom Post
See screenshot from below how to add custom taxonomies/categories for your custom post. In our example the chosen Custom Post type is Properties


Click on Categories to display the post’s taxonomies
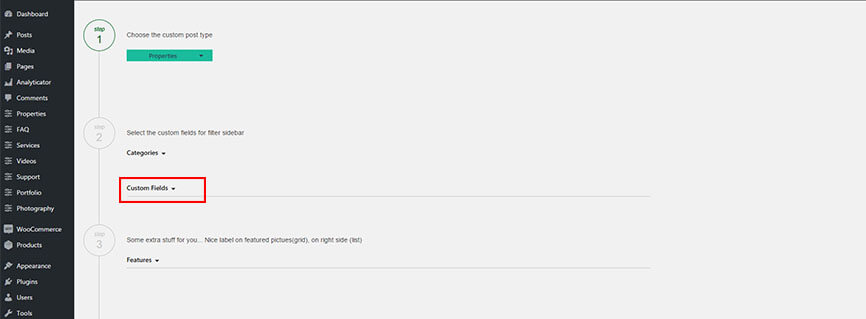
Click on Custom Fields to display all the custom fields from selected Custom Post
- In case if you want to filter the posts by taxonomies/categories – you need to make sure that they were added already to Custom Post
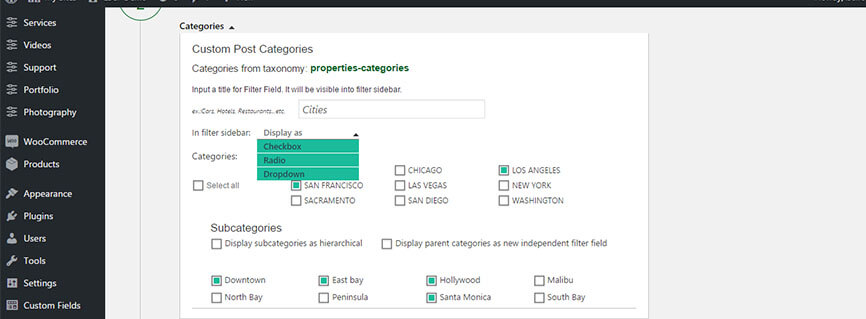
- Filter by your post taxonomies. LSCF will detect all posts/custom post taxonomies and will display its terms in the following format as screenshot below.
Select a name (in our case “Cities”) for your terms filter, also you have an option how to display the taxonomy terms in the filter, as: checkbox, radio and dropdown
- Generate multiple filters using the terms from the same taxonomy
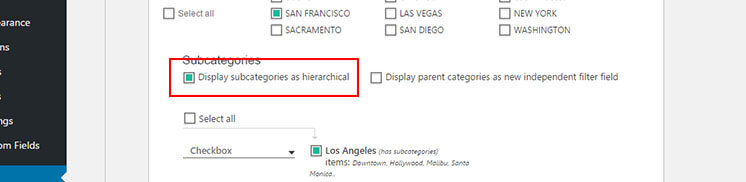
Click on “Display parent categories as new independent filter field” to activate the option. This option is designed to display multiple filters using the terms from same


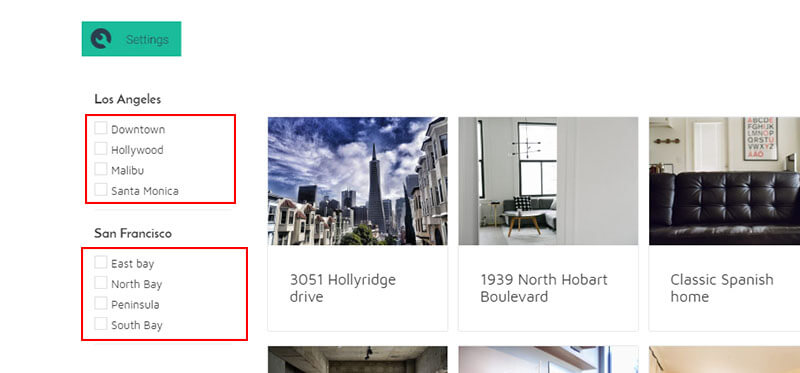
Each child group will become a new filter field. So, in the example below, we have the Los Angeles & San Francisco as parent categories with their children.
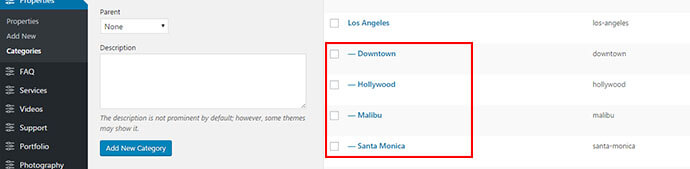

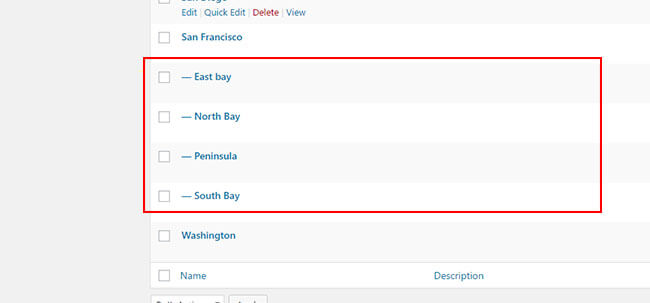
So, in the generated filter the “Los Angeles” children and the “San Francisco” children will become as 2 independent filter fields. See screenshot below:

- Generate multiple filters using the terms from the same taxonomy
- Display terms as hierarchical levels
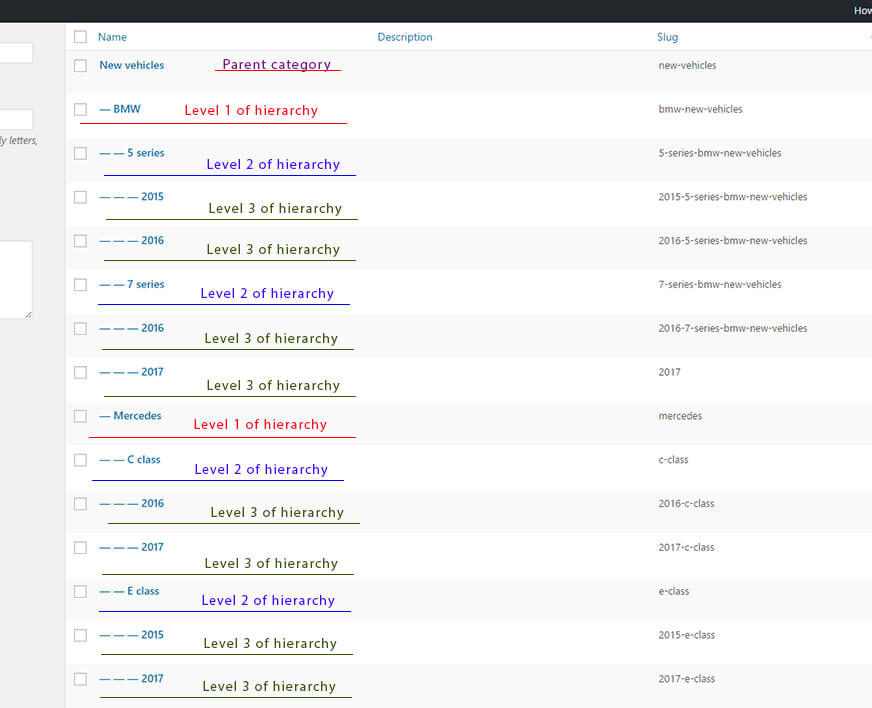
LSCF supports unlimited levels of hierarchy. It works only with taxonomy terms. You just need to group your taxonomy terms in a hierarchy way as WordPress provides.
See example below of the WordPress terms arranged in a hierarchical way – it’s taken from our hierarchical demo https://lscf.pixolette.com/hierarchical/

To activate the hierarchical terms display, check the Display subcategories as hierarchical

- Select the custom fields that would show up into filter sidebar. Choose the display type of each custom field.
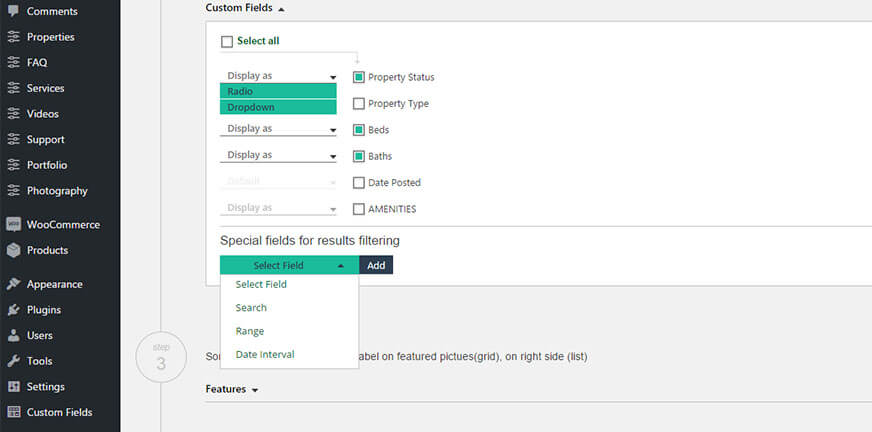

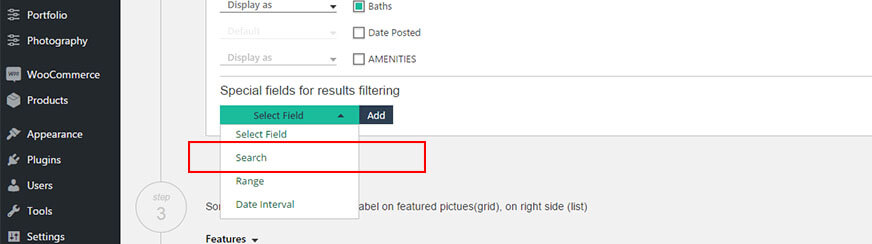
- Additional Filter Fields.
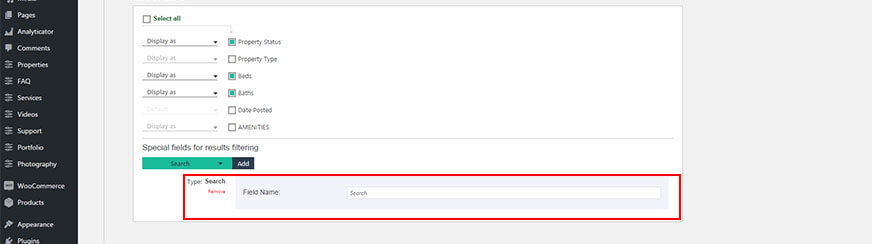
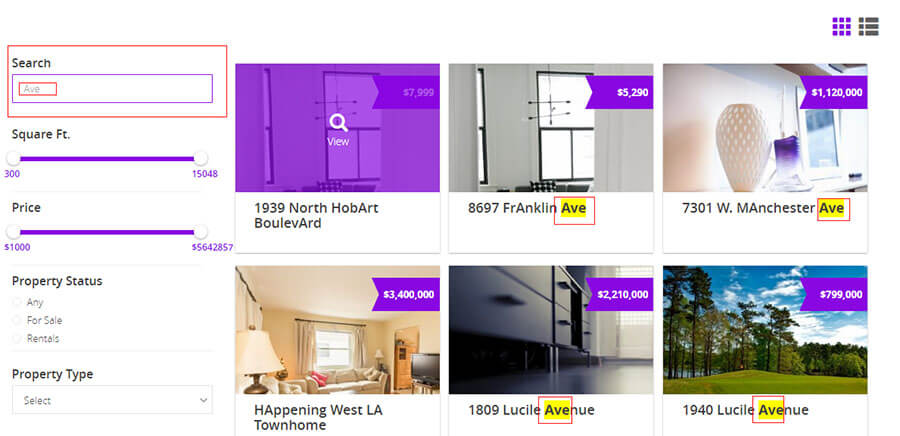
- Additional Filter field: Search
It’s live/instant search of Custom Posts. Will search through all Custom Post’s title and description


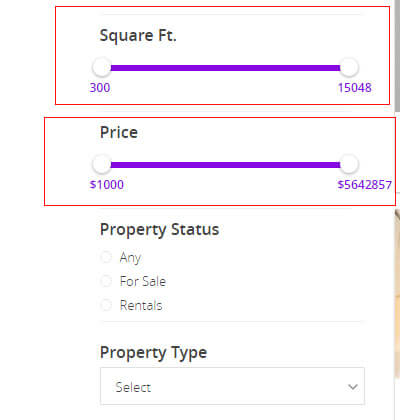
- Additional Filter field: Range
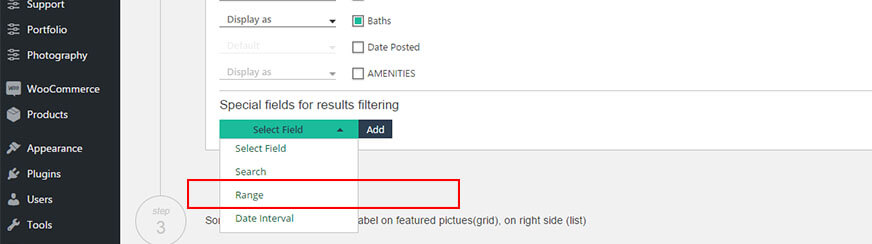
It searching by a numeric value. Works only with Custom Fields of Text type!
It detects all Custom Fields of Text type from selected Custom Post. The range will work fine with your Text Custom Field even if it has some text+digits.. For example, A Price field that would be a custom field of Text type will have the following values:
$ 1200/month – Range will work fine, it will give correct search results as it will grab 1200 as a number
12 some text $ 200/month – Range will give wrong search results as it will grab 12 as a number In our example, we have 2 Custom Fields of Text type: “Price”, and “Square ft.”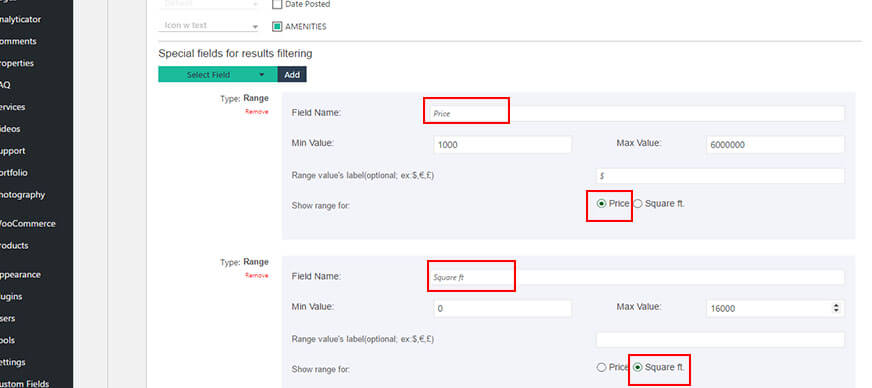


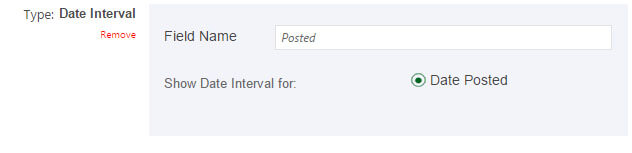
- Additional Filter field: Date Interval
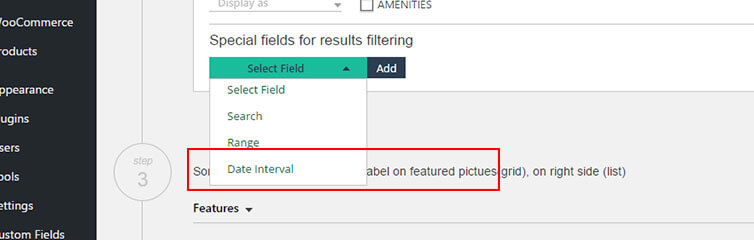

It searches between 2 dates. Works only with Custom Fields of Date type!
It detects all Custom Fields of Date type from selected Custom Post.

- Additional Filter field: Search
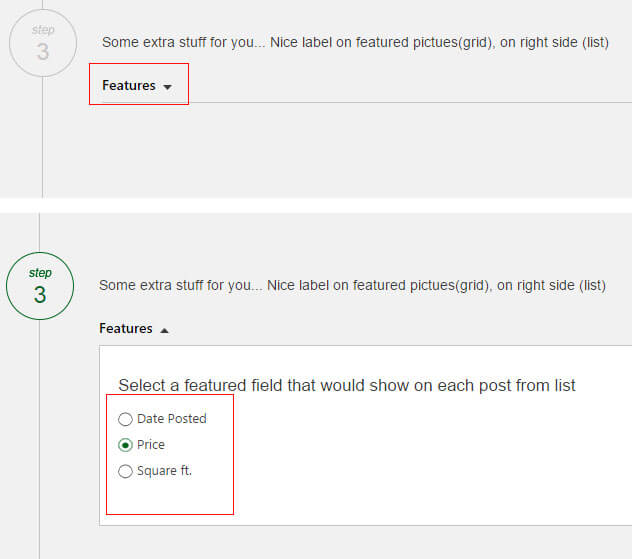
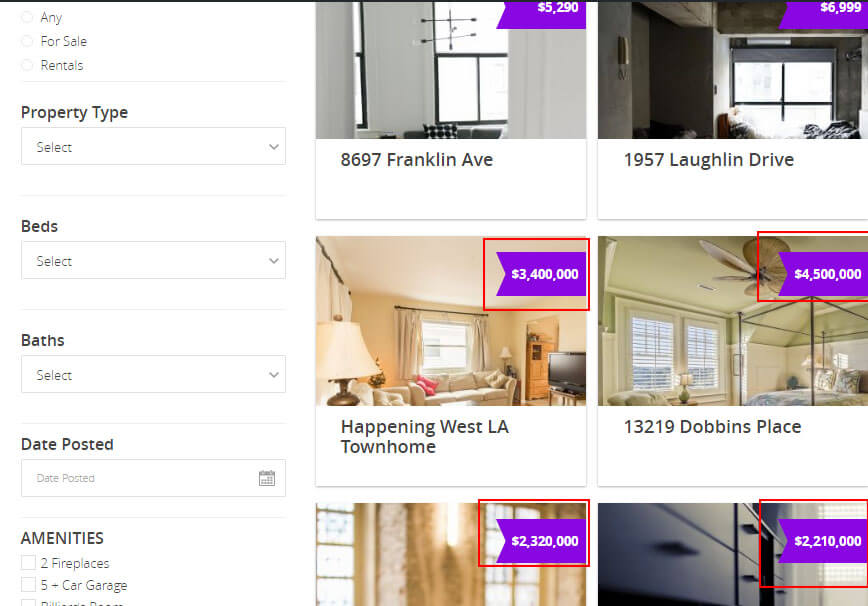
- Set Custom Fields of Text type or of Date type as featured. It will show up on posts listing.


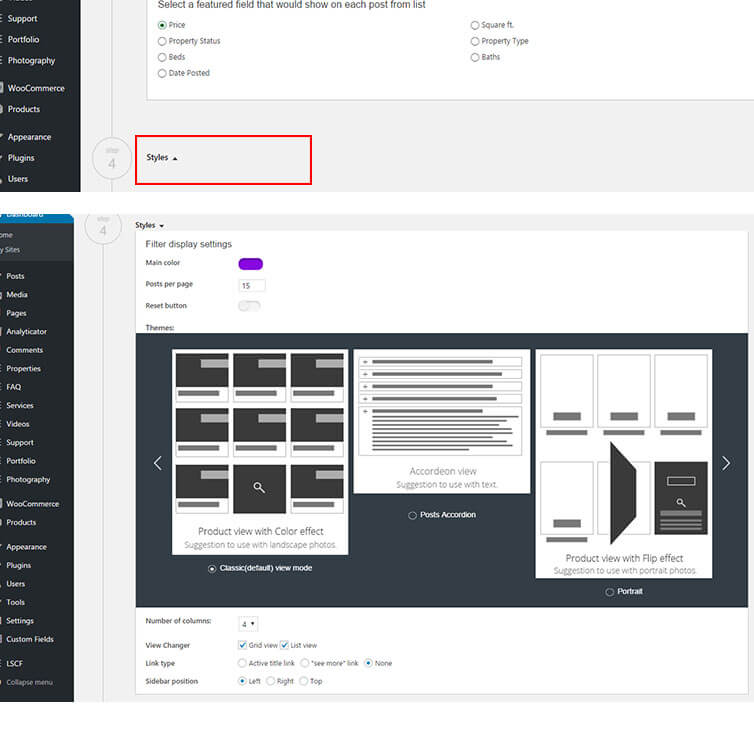
- Chose a template for your filter, set columns number. More options are available in the Frontend Editor

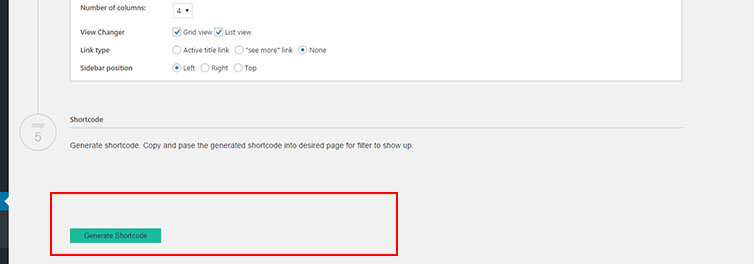
- Click on Generate Shortcode to generate your filter’s shortcode.

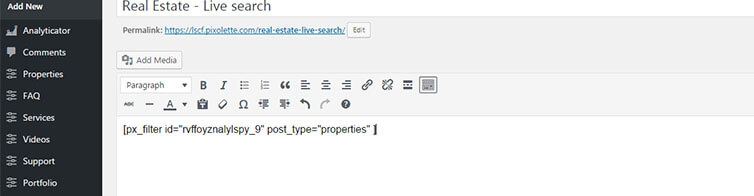
- Copy generated shortcode to WordPress page to show the Custom Filter.


Placing Pixels.
Growing Ideas.
Growing Ideas.