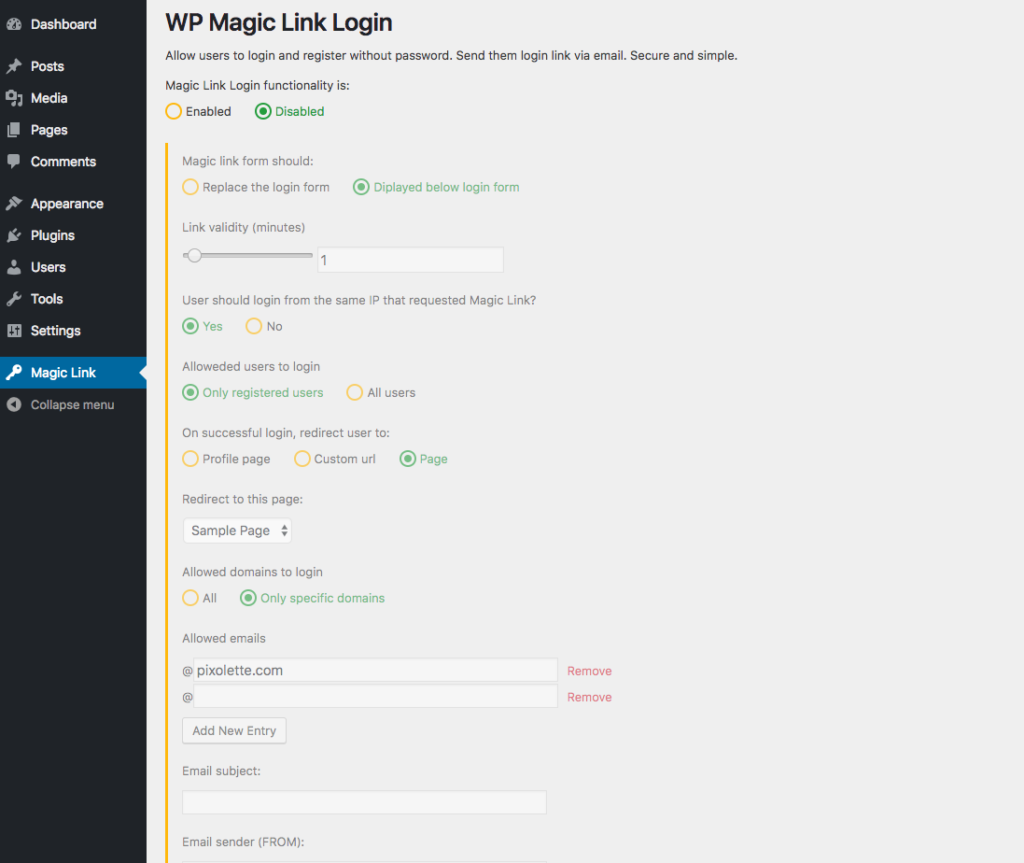
By default, when installing the plugin, the Magic Link functionality is disabled. You’ll have to enable it. Go to Admin dashboard -> Magic Link:
Click on the “Enabled” and then choose the needed settings.
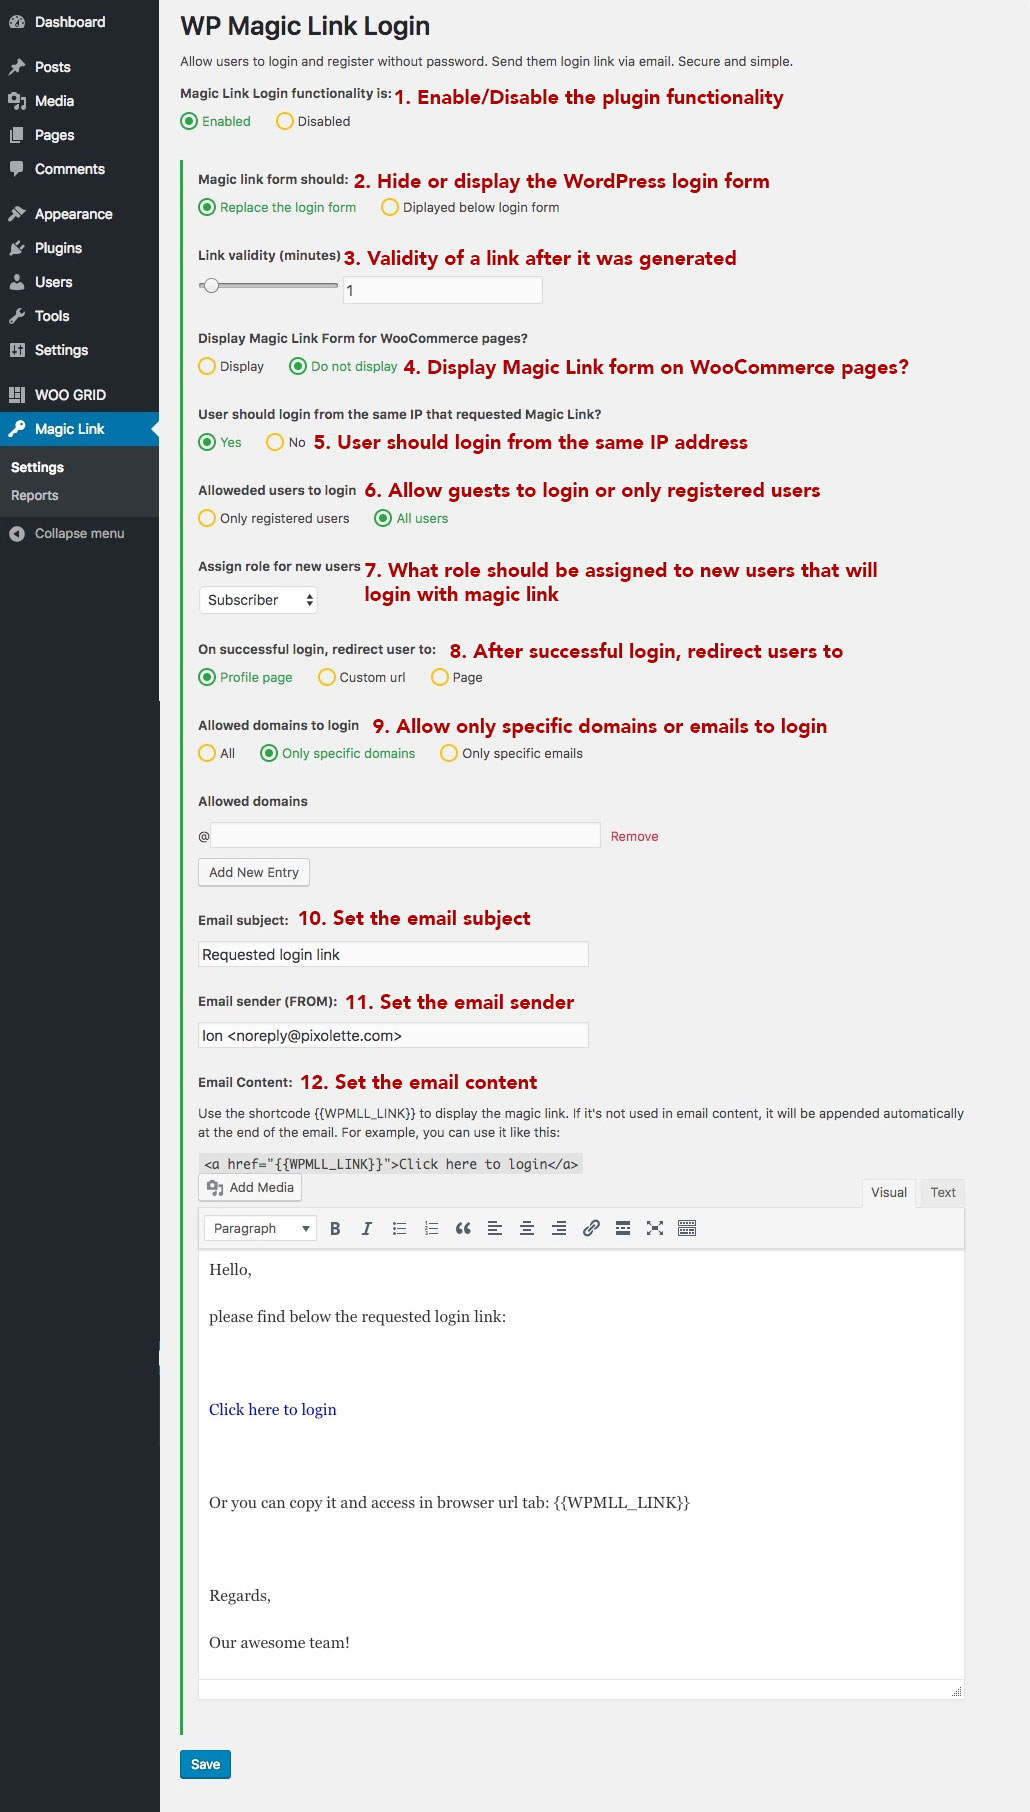
2. Magic Link form should
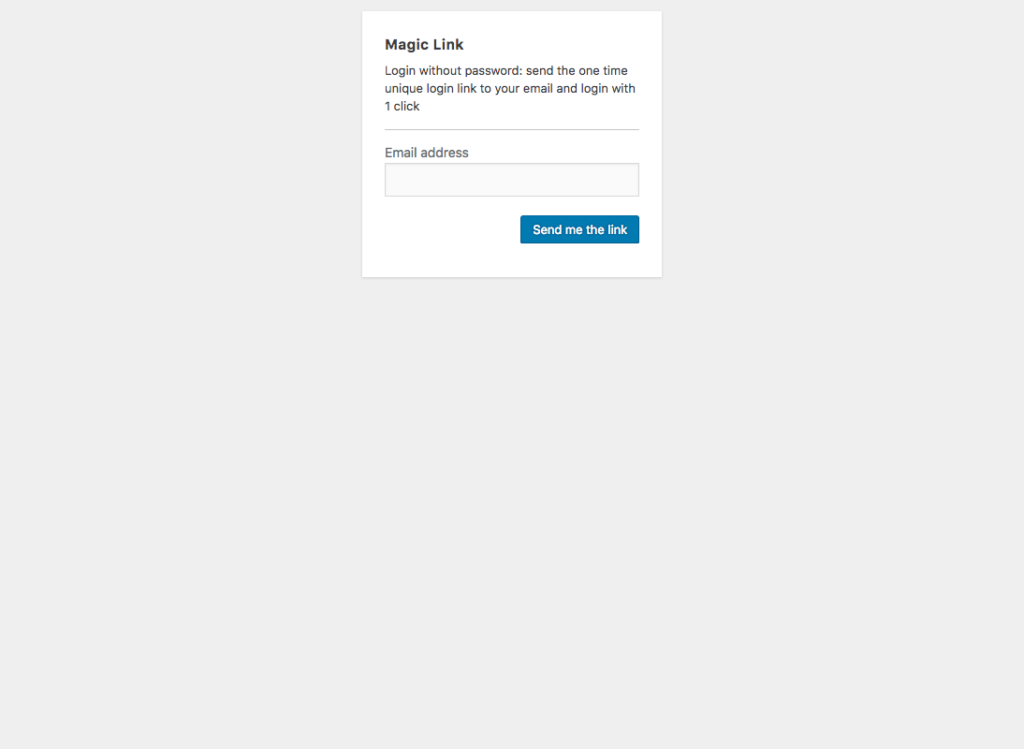
- Replace the login form – in this case, on the login page, only the form that asks for email and sends the Login Link will be displayed; see the image below:

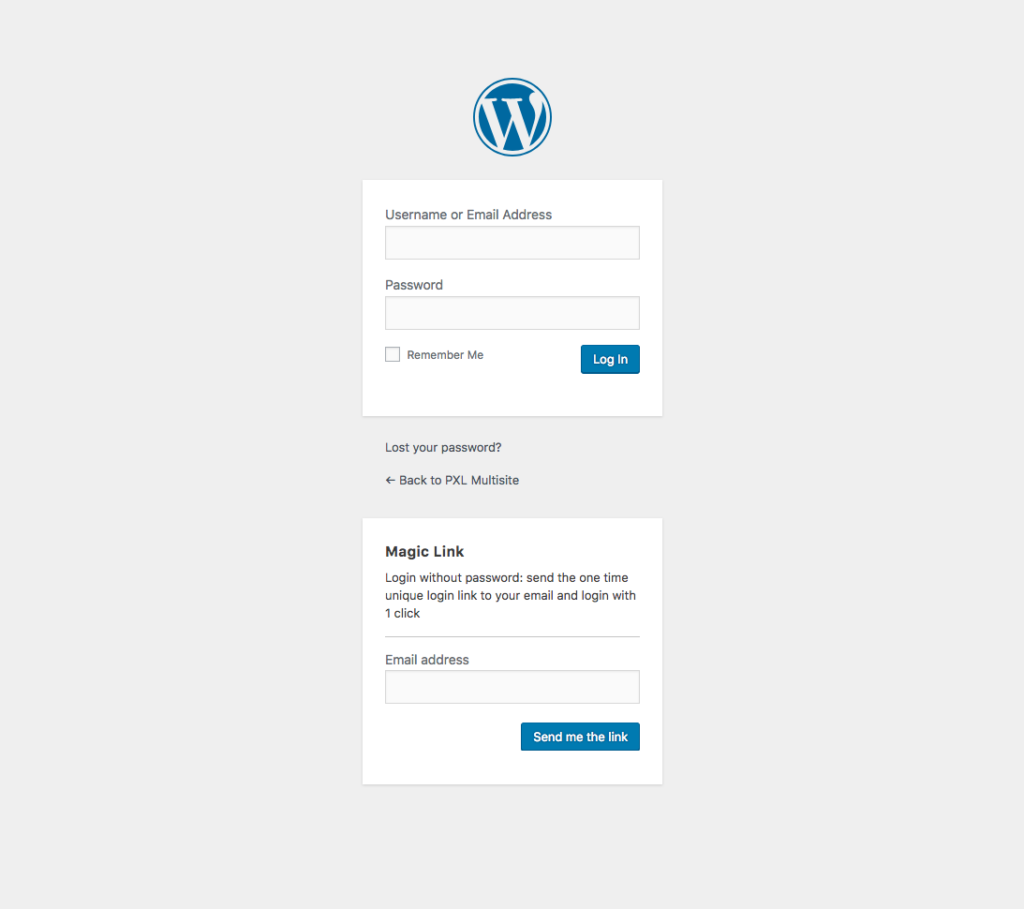
- Displayed below login form – in this case, the magic link form will be appended below the default WordPress login form; see the image below:

3. Link validity (minutes)
We care about your website security and created the WPMLL plugin to be secure. Here you can choose how many minutes should be a link valid after it was generated. Some emails can be received with a delay and this is why by default it will be valid for 3 minutes. You can choose any value bigger or equal to 1 minute.
4. Display Magic Link for WooCommerce Pages
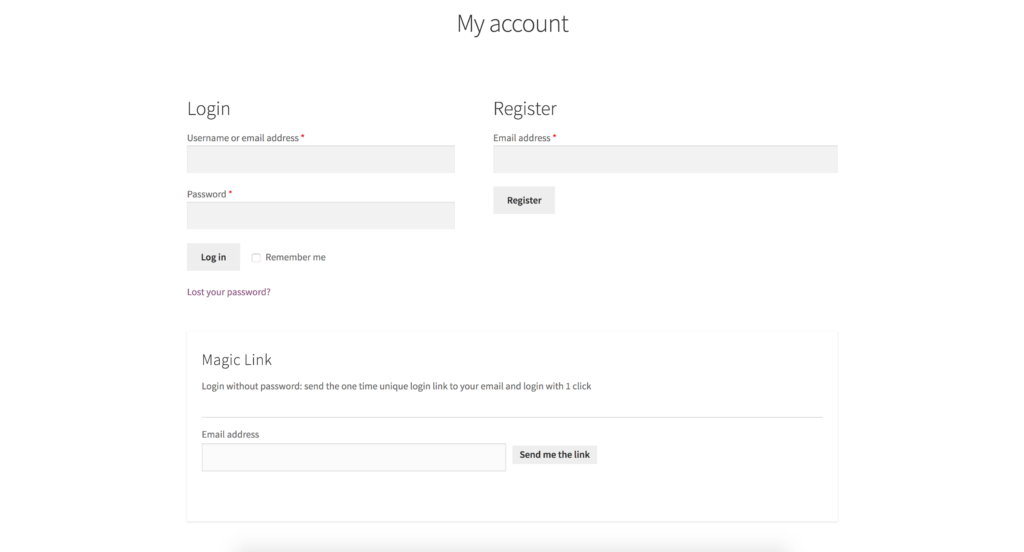
Display – in this case, on the My Account page will be displayed:
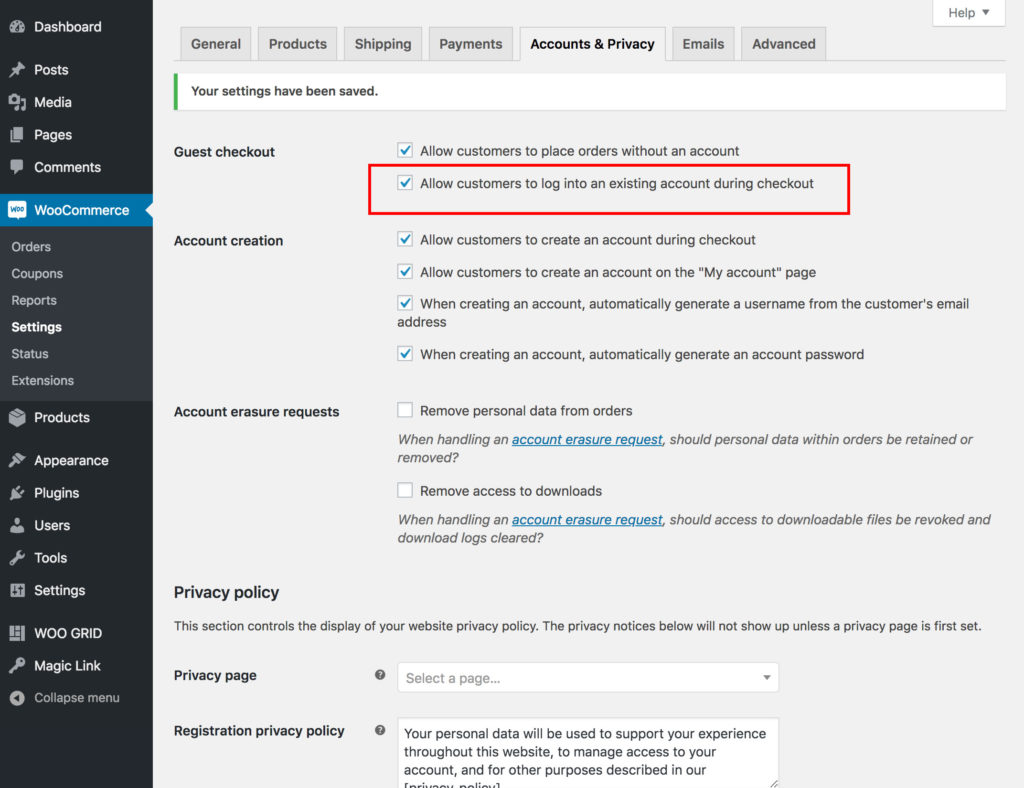
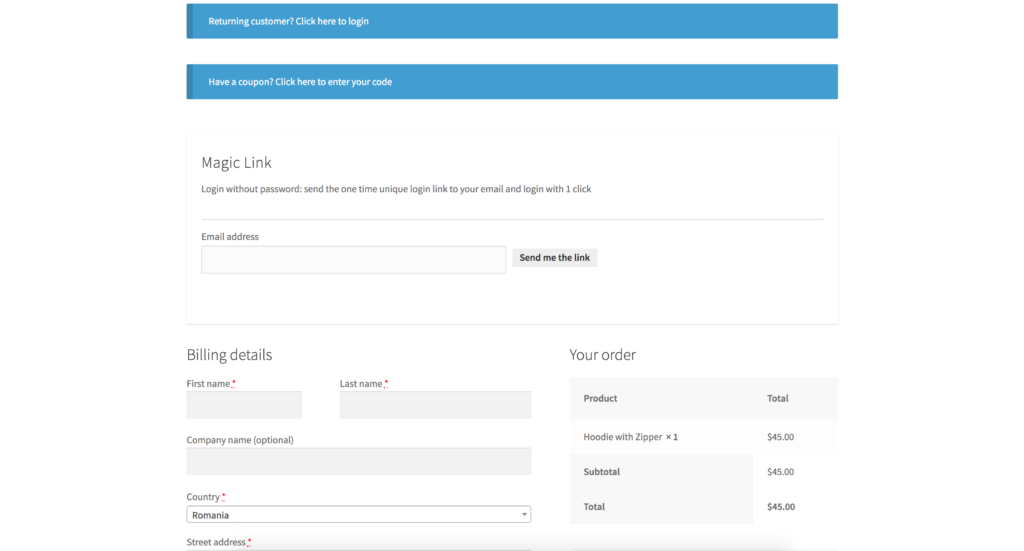
If you want to display the form on the checkout page, you have to enable it from the WooCommerce Settings page:
5. The user should login from the same IP that requested the magic link?
Here you can choose if the users should access the link from the same IP or not.
6. Allowed users to login
Here you can choose who can login via a magic link: only users that are registered on your website (also users that are added manually by admin) or you allow all users to login, even those that don’t have an account. In this case, on the first login, an account will be created with the email address that guest submitted.
7. What role should be assigned to new users that will login with magic link?
If you’ll allow guest users to login, on their first login, an account will be created. Here you can choose what role should be assigned to user’s account.
8. On successful login, redirect the user to:
Here you can choose the landing page for a user that logged in via Magic Link;
- Profile page – the user will be redirected to his profile page
- Custom URL – a user will be redirected to a custom URL
- Page – the user will be redirected to an internal page
9. Allowed emails
You can set the email tld or a list of emails that are allowed to login. Useful when your website is used by company’s internal users. For example, your company websites is https://awesome-co.tld – you can set that only users that have an email address with awesome-co.tld to be able to login.
10. Email subject
Set the subject for the email that will be received by user.
11. Email Sender
Set the email sender for the email that will be received by the user.
12. Email content
Set the email content for the email that will be received by the user. You must use the shortcode {{WPMLL_LINK}} – it will be replaced with Magic Link
13. Save button
Don’t forget to save the settings 🙂


